 1.) INTRODUCTION
TO LIGHTING METHODS
2.01 General Design Methods
2.02 Single Source Methods
2.03 Point Source Methods
2.04 Multi-source Methods
2.05 McCandless Method
2.06 Area Lighting
2.07 Toning & Blending
2.08 Background Lighting
2.09 Features and Specials
2.10 The Secret Method
 1.) INTRODUCTION
TO LIGHTING METHODS
There is no one 'method' for lighting the stage - there are many. Or put another way, the first rule of stage lighting is...there aren't any. As long as the objectives of the lighting design and the lighting concept are met, the designer may use any appropriate DESIGN technique that he wishes. The professional lighting designer must however communicate his design to others, through the use of standard conventions.
Each production has very different lighting needs. Lighting for a production of 'Annie' vs a Martha Graham dance piece have totally different styles and requirements. The lighting student must not look for a 'system' or a 'method' that will work for all lighting needs. There isn't one. Instead the lighting designer must understand the needs of each particular production, carefully define them and then produce the lighting design accordingly. It is only by this approach that the lighting design will be most efficiently suited to the exact needs of the production. No two productions are ever the same and no two lighting designers ever work alike.
2.) VISIBILITY VS MOOD
The first and most important principle of stage lighting is still considered to be VISIBILITY. This was probably also true for early lighting designers, using candles, oil lamps, gas lighting and electric arcs.
Usually the designer will light the actor first for visibility and then for mood and atmosphere second. There are times however when MOOD may wish to overpower visibility (at least temporarily). Today many concert designers may light a stage first for mood and impact and then second for visibility. In this respect, much of the general lighting might consist of strong colors, projections, or moving effects. Using the followspot or the automated lighting fixture, the designer can 'cut' through the mood lighting and add controlled, precise lighting to performers, any where on the stage.
3.) EVOLUTION OF METHODS AND EQUIPMENT
Most lighting methods have evolved from light source and fixture technology. Spotlight fixtures today provide the designer with narrow beam spreads of about 10-40 degrees. This was not always the case. Less than 100 years ago, most lighting consisted only of flood lighting, as the narrow spot did not exist. With the development of the spotlight (lime light, electric arc, then incandescent), lighting methods changed. It now became possible to precisely place and localize light, anywhere on stage. As equipment continues to develop, so will lighting methods. With the new generation of automated fixtures, new lighting looks never before seen - are now possible.
 1.) SINGLE SOURCE
METHODS
A designer may wish to light an entire stage with a single source of light as the sun or moon lights the earth, causing strongly motivated directional lighting, with a single shadow. This is seldom practical however for a number of reasons.
First, there are very few high-power lighting fixtures that are capable of lighting an entire stage. Typically a fixture of 10,000 watts or more would be required to provide the lighting to a small stage area.
Second, a single large fixture would be quite uncontrollable and would not only illuminate the acting area, but also the surrounding stage, wings and perhaps even some of the audience.
Third, for true single (point) source lighting to 'work', the source must be a great distance away. This is seldom possible in most theatre facilities.
In nature the point source of light is a great distance away. Assume the sun to be a lighting fixture and move say 25 feet 'away'. The drop-off of light is not noticeable. You have hardly moved away from the source at all. Now imagine a single stage lighting fixture, say 100 feet from the stage. An actor might move back 25 from the source. He has now moved a much greater distance in relationship to the source and the drop-off of light will be very noticeable. This is due to the inverse square law nature of light. The further the distance from the source, the more rapidly lighting levels drop. It is generally not possible to find appropriate mounting locations in most theatres for single source lighting and as a result, multi-fixture techniques are typically used instead.
There is also an important lighting concept that relates the size of a source to the sharpness of it's shadow. In general, the smaller the source, the harder the shadow. Conversely, the larger the source, the softer the shadow. For example, at the same distance a lighting fixture with a 6 inch diameter lens will produce a harder shadow than a fixture with a 36 inch source diameter (such as a: scoop, light box or box flood). Also as the distance to the source is made to increase, the hardness of the shadow will increase.
Although lighting an entire stage production with a single source of light is usually not practical, single source lighting does have its uses. Often it is possible to use a single source of light when highly dramatic, stylized or 'effect' lighting is required for a specific scene. It is possible to light an entire scene from a single source such as the light from a table lamp or from an open refrigerator door however it is important to note that the audience can often tire easily of this.
 1.) POINT SOURCE
LIGHTING
Most stage lighting fixtures perform as 'point' sources. In this respect they produce a single shadow and they provide a light output that follows the inverse square law. For example, A lighting fixture 50 feet away might provide 100 footcandles. If the distance is doubled to 100 feet, only 25 footcandles are provided (one quarter).
Point source lighting forms the fundamental basis of all stage lighting design. The basic ingredients of all lighting design include the FRONT, BACK, DOWN, DIAGONAL, SIDE and UP light (and everything in between). The designer will sometimes use these basic single sources alone but most often they will be combined. Nothing is more dramatic than a modern dance piece lighted only with a series of isolated down lights or a single diagonal backlight, against an illuminated cyclorama. Nothing is more tiring and boring than watching a drama illuminated only with a series of tight pools of light.
The student designer must get to know the FRONT, BACK, DOWN, DIAGONAL, SIDE and UP light very well. He should experiment in an actual theatre with different types of equipment mounted in these positions. He should try different angles and should light different backgrounds, scenery and even actors. When the basic single sources have been mastered, two or more lighting angles should be combined on a single area. This is a very important exercise and forms the basis of all lighting design.
There are also a number of lighting books that contain photographic lighting studies of the basic sources (front, back, side, etc.) lighting a mannequin or an actor. One of the better studies is by Jean Rosenthal in her book 'The Magic of Light'. This photographic essay shown a number of lighting fixtures mounted in typical theatre lighting locations. The study contains excellent photographs, renderings and drawings of many different examples. There is also a light plot included showing the type and layout of all the equipment used.
 1.) MULTI-FIXTURE
LIGHTING
Today most stage and entertainment lighting design uses multi-fixture lighting methods as opposed to single or point source methods. This allows the designer to have full control over the lighting, anywhere on stage, in respect to intensity, direction, distribution, color and movement.
Multi-fixture methods use a wide range of fixture types and a wide variety of lighting techniques. Today, most fixtures use the 'dimmable' tungsten-halogen lamp as a source. Increasingly however new H.I.D, (high intensity discharge) sources are finding their way into stage lighting applications. It is common today to integrate both conventional lighting fixtures with the new generation of automated fixtures, resulting in both a sophistication and simplicity of lighting design, never before possible.
It is not unusual for a modern theatre or concert hall to use 400-500 lighting fixtures for a single production. Ideally each lighting fixture will have it's own dimmer control. In older facilities with a limited number of dimmers, it is sometimes necessary to physically plug (or 'patch') several fixtures onto one dimmer.
Many lighting designers will often try to use only specific fixtures for specific scenes. Some designers may design a 'general plot' that is intended to work equally well with all scenes. Still other designers will use a combination of 'general' and 'scene specific' fixtures. The exact approach will usually be dictated by the available equipment, mounting positions, time and budget.
Usually the designer that has done his homework will only hang the number of fixtures that are required for his design, and a few spares. Other designers, not really sure of what there doing may use a 'cover your tail' approach and hang a fixture in every possible mounting position that the theatre will allow. (Just in case.) These designers can make a 400 fixture design look like a 120 fixture design, with ease.
Conventional lighting fixtures are always hung on 18 inch centers (or more). A typical 30 foot long pipe will accommodate 20 fixtures total.
 1.) MCCANDLESS
METHOD
Although there may be no 'one' method of lighting design, there is however a systematic approach that was proposed by Stanley McCandless (Yale University School of Drama 1925-1964). It is this approach that is the foundation for modern stage lighting design today.
2.) ACTING AREA LIGHTING
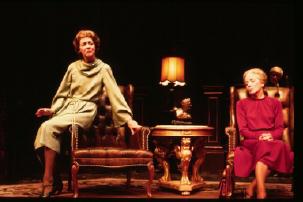
McCandless proposed that the stage setting be broken up into a number of ACTING AREAS, each with two (2) fixtures. The fixtures were to be positioned overhead as front lights at approximately 90 degrees to the area. Further the fixtures were to be located approximately 45 degrees horizontally. Next McCandless proposed that each lamp have a different color filter, a 'warm' from one side, a 'cool' from the other. Each area was also (ideally) given individual dimmer control.
An 'open' stage would be typically broken into 9 areas (more or less as required), each having an 8-12 foot diameter. Areas might be arranged; 3 downstage, 3 center stage and 3 upstage.
The two fixtures provided VISIBILITY to the actor. The dimmer controls allowed areas to darken or brighten as needed, providing SELECTIVE FOCUS, COMPOSITION and MOOD to the overall stage picture. The position of the two fixtures, allowed an actor to 'play' to either his right or to his left, and still be in a KEY light. The angle between the fixtures provides excellent plasticity and form to the human face. The opposing warm and cool colors assist in providing interest, contrast and naturalistic lighting.
3.) BLENDING and TONING
Light the actors first for visibility, then light the surroundings separately for mood and atmosphere, was the McCandless's approach. Sometimes no additional lighting is required, letting the 'flare' from the acting areas illuminate the walls of a set. Alternately, scenery may need WASH or FLOOD lighting to help integrate and blend it into the entire lighting picture.
4.) BACKGROUNDS and BACKDROPS
Backgrounds, backings, backdrops and cycloramas should all be illuminated separately from the actor and from the scenery.
5.) EMPHASIS and SPECIALS
McCandless recommended additional fixtures (if needed);
(a) to provide 'acting area specials' (entrances, furniture, etc).
(b) to provide motivation (sunlight, moonlight, firelight).
(c) to provide projection or effects.
 1.) AREA LIGHTING
Typically all stage lighting has to do with the lighting of a performer (dancer, actor, musician, etc.). Performers tend to work in AREAS. This is a good thing, because most stage lighting spotlights tend to provide localized areas or pools light.
Usually the first element of lighting design, is the ACTING AREA LIGHTING. Sometimes referred to as 'key' lighting, this lighting provides visibility to the performer - on an area by area basis. Area lighting when used with dimmer control, also provides a valuable method of isolating or accentuating a performer in any area on the stage. In addition, properly designed area lighting can also contribute to the overall, mood, atmosphere and composition of the stage picture.
It is important for the designer to be able to visualize the performance space, in the form of invisible three dimensional lighting areas. These areas should relate to the architecture and geometry of the stage or stage setting. Alternately, these areas should relate to the activities and blocking of the performers.
2.) ACTING AREA - FIXTURES
The ellipsoidal reflector and the fresnel spotlight are two luminaires particularly suited to the needs of area lighting. These fixtures provide beam spreads of from 10 - 50 degrees and are typically available in wattages of 500 to 2000 watts.
3.) ACTING AREA - METHODS
Typically the stage is broken down into a number of areas, across the front, across mid-stage and across upstage. Typically 3 x 3 or 9 areas total might be provided for a small box set. As many as 9 areas wide x 5 areas deep, might be provided for a large opera or musical. A large arena show may have over 100 areas.
Note that an uneven number of areas (3-5-7-9 etc) across the front of the stage is particularly useful. This system always provides an area on the center line - most often where half the show will take place.
Areas of 8-12 feet across seem to be most useful for theatre area lighting applications. Large arena type productions might however be better provided with areas of 12-20 feet across (or more).
Areas may be illuminated with one or more lighting fixtures. Typically, an area might be provided with a front light, a downlight, and a back light - depending on the needs of the production. Areas may also be illuminated with two (2) fixtures from the front and at 90 degrees to each other (after McCandless). The principle objective of area lighting should be to light the actor and avoid lighting the background. In this respect the lighting designer must carefully select both the angle and direction of all area lighting.
Although McCandless recommended that fixtures be mounted at 45 degrees above the horizontal, modern lighting practice tends to use angles of 45-60 degrees (or more) for front area lighting. Generally the higher the angle the more 'shadowy' and dramatic will be the lighting. Higher angles are good to prevent spill light upstage. Lower lighting angles are good for lighting the eyes and for lighting under hats.
 1.) TONING &
BLENDING
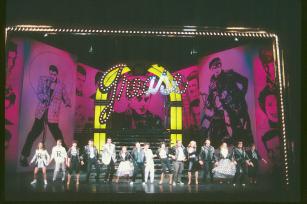
After lighting the actor with AREA LIGHTING, it may or may not be necessary to provide additional light to the surrounding scenery. Usually lighting specifically used to light the scenery is referred to as 'toning and blending' lighting - as it helps tone the scenery and blend with the acting area lighting.
Sometimes, for example when lighting a drama, in a box set, only area lighting may be required. No additional lighting is needed to light the set. This is due to the fact that reflection from the area lighting may bounce off the floor and illuminate the walls in a most naturalistic and appropriate way.
Alternately, however, if the production is a comedy, the set may feel a bit dark and dreary. No matter how the lighting designer tries to boost the acting area lights, the set still looks dark in comparison. In this case, additional lighting of the upper walls of the box set would probably provide an appropriate visual lift.
2.) TONING & BLENDING - FIXTURES
Toning and blending lighting, tend to use different fixture types, depending on the exact lighting application. Spotlights, floodlights and striplights all have their place.
3.) TONING & BLENDING - METHODS
Often toning and blending lighting is provided by soft flood type of fixtures. Both strip lights and box floods are suitable for this application.
Alternately spotlights may provide a more dramatic form of toning and blending. I personally like to use ellipsoidal reflectors with soft focus break-up templates to provide a textured toning and blending light to each wall of a set. These fixtures are usually located at a fairly low angle (box booms), and gently 'wash' and tone the scenery as needed.
During the early 1900's and until about 1960, toning and blending lighting was often provided from a series of three (3) or four (4) color strip lights, mounted above the stage. Strips (also called X-RAYS) ran from stage left to stage right, and were often used; downstage, center stage and upstage. Some theatres might have as many as five (5) sets of strip lights, permanently installed. Strip lights typically would be colored with glass or plastic filters in; red, green, blue and amber. Musicals, operas and variety shows, found strip lighting particularly useful in providing color washes. One moment the stage could be completely bathed in a night blue, the next in daytime amber. The red, green, blue, primary filters allowed just about any color to be mixed to provide an instant color wash to the stage, or the scenery below.
 1.) BACKGROUND
LIGHTING
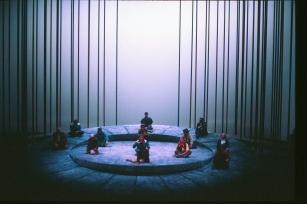
After lighting the actor with AREA LIGHTING, and after lighting the set with TONING & BLENDING LIGHTING the designer will separately light all backgrounds. Backgrounds are generally taken to mean - backdrops or background cloths. The painted backdrop has been used for hundreds of years in theatre, opera and dance. A properly painted backdrop can sometimes convey a sense of depth unrivaled by 3-dimensional scenery.
Backgrounds lighting also includes the lighting of large cycloramas to small patches of a painted drop, peaking through the window of a box set. A stylized opera or ballet might be performed on an open stage with only a 30' x 60' cyclorama as a background. Other productions might use 10 or more painted backdrops. Sometimes backgrounds may be realistic. At other times they may be abstract, surrealistic, impressionistic, or highly stylized.
2.) BACKGROUND LIGHTING - FIXTURES
Typically, backdrops are illuminated with striplight fixtures - sometimes called X-Rays, borderlights or battens. The striplight fixture consists of a linear lighting strip (usually 6-9 ft. long), with 9-12 individual lamp compartments. The compartments are wired in 3 or 4 circuits, with each circuit, colored as required with plastic filters. Sometimes the three (3) primary colors are used (red, green & blue), so that the designer can mix almost any color.
Striplights have developed essentially, as lamp technology has developed, using first oil and candles, then gas then the electric filament lamp, with a crude reflector. Some modern units use 'R' or 'PAR' lamps. A miniature striplight using the MR16 lamp was developed in the 1980's and is sometimes referred to as the 'Zip-strip'. Although compact and efficient, this product is not without problems. Lamps are wired in series with (typically) 10 x 12 volt lamps on each circuit. This means if one lamp 'blows', the entire circuit turns off. In addition the maximum wattage lamp available is the 75 watt, MR16 lamps. These 75 watt lamps typically burn at a temperature sufficiently hot to cause damage to most lamp sockets, after a period of time. If the designer wants reliability, he is forced to use a lower wattage lamp (ie 42 or 50 watts).
The asymmetrical box flood provides an alternate to the striplight fixture. This fixture has an asymmetrical reflector to 'push' more light towards to bottom of the drop. These fixtures are also available in compartment type fixtures of 1, 2, 3, and 4 compartments each.
3.) BACKGROUND LIGHTING - METHODS
Usually, the designer is trying to achieve a soft, even and smooth illumination across the entire backdrop. The backdrop may be illuminated only from the top, only from the bottom, or from both top and bottom at the same time. A cyclorama is often illuminated with three (3) color lighting from both the top and bottom. In this respect it is possible to provide a wide range of dynamic sky effects, using different colors from the top and bottom.
Backgrounds can also be illuminated by either front or rear screen projection. Sometimes backgrounds are illuminated with moving clouds with gobos, or with streaks, slashes or other symmetrical or asymmetrical effects.
 1.) FEATURE LIGHTING
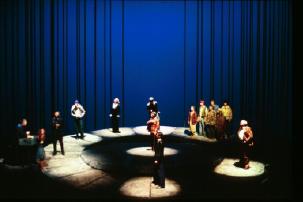
Feature lighting (or specials) are lighting fixtures used for very specific applications - other than acting area and background lighting. Typically they are used to supplement the general area lighting or to provide specific lighting effects.
A 'special' might consist of a tightly focused fixture on the face of a clock or on a painting hung on stage. This can allow the designer to reduce the general lighting and 'feature' or draw attention to any object or part of the stage. (A cheap trick, but effective!)
This also works with actors. If three actors, seated at a table are each lighted with a tightly focused 'special', it will be possible to visually shift attention from one actor to another, or balance all three equally. The use of specials for actors also guarantees they will be properly illuminated when needed, for dramatic reasons.
2.) FEATURE LIGHTING - FIXTURES
The ellipsoidal reflector is usually the fixture of choice for features and specials. Typically narrow angle E.R. fixtures are used with beam spreads of 5-20 degrees. These fixtures are often used with framing shutters, irises, or with other beam shaping devices - to put the light only where needed. The beam edge may be adjusted from 'hard' to 'soft' depending on the design objectives.
Sometimes beam projectors and PAR type 'pin spots' are also suitable for use as specials. These narrow angle fixtures can only provide a soft edge beam, usually with a slightly oval shape.
When the designer uses tight specials for performers, sufficient time must be given during lighting rehearsals to allow the actor to properly 'find his light' and be confident that he can be 'on the mark' each time. An actor that is out of his isolated special generally makes everyone look bad, so spend the extra time to make specials work.
 1.) THE SECRET
METHOD OF LIGHTING DESIGN
There may be no one method of lighting the stage or there may be no 'rules' of lighting design - there is however 'the secret' of good lighting design. The secret is: KNOWLEDGE, UNDERSTANDING, EXPERIENCE and PROFICIENCY. Many lighting designers may take the 'experimental' approach, and just try things, with no real method or concept of what they are trying to achieve. Sometimes this method gives brilliant and exceptional results. More than often it does not. Experimentation is very important for the lighting designer and all designers should try new things whenever possible. It is only through a systematic approach however that the lighting designer will be able to provide predictable and consistent result in any number of different situations.
The designer must know what he is lighting and how he wants the production to look. The designer must be very familiar with the script and all lighting requirements of the production. He must use the qualities of light and objectives of stage lighting to allow him to fully visualize, verbalize and define his design concept and intentions.
The designer must have a complete understanding of the many different types of luminaires, used in different lighting positions (both alone and in combination). He must know what the FRONT LIGHT, SIDE LIGHT, DOWNLIGHT, BACKLIGHT, UPLIGHT and DIAGONAL lighting positions produce - in any combination. These are the building blocks of lighting design and the designer must instinctively know what fixtures to use and from direction. This comes only from experience.
The designer must also know how to PRACTICALLY realize his design in an actual theatre or performance space. The designer must know the venue and have details of all lighting positions. He must know what equipment is needed to realize his visual image of the production and where to use it. He must know the many available design methods, (point source, single source, multi-source, etc.) and he must chose methods that will meet both his design criteria - and the budget.
Lighting design is not a solitary art. The designer must learn to collaborate with many other members of the production, design team and crew. In this respect the designer's 'human skills' can make or break the entire lighting design. The professional lighting designer must be concerned with PROCEDURE however he must also be concerned with RESULTS - and know how to get it.